 Displaying Children’s Art
I’ve always struggled with how to display my boys’ works of art. I’ve gone the usual fridge route, but as a homeschooling family, we tend to have lots of artwork and school papers to display—way more than my fridge could possibly hold. And I have to admit, I love the look of a clean, tidy stainless steel fridge, not covered with anything.
For the two years we’ve been living and homeschooling in this house, I’ve used a white cabinet with doors to hold school supplies and books. It sits in our dining area, which is also our homeschool area. I’ve used this cabinet as our artwork/schoolwork display area by taping each work of art or special schoolwork paper up on the doors of the cabinet. It’s worked, but I’ve never loved having a cabinet with taped-up papers all over it, and it also only holds so many papers in just that one spot. I considered the typical string with clothespins idea, but it’s too cluttery for me and doesn’t look very nice from a design standpoint—at least not in my dining area. I also considered putting up lots of frames on the wall and displaying them that way. That would look very nice, but it’s a little pricey for me and switch-out is a bit difficult, especially because I like to frequently rotate what’s displayed.
I racked my brain for ideas on how to tastefully display their artwork & schoolwork, in a way that blends with our design and decor. Then one day I was in T.J. Maxx, and I saw a plaque made for displaying kids’ works of art; it had three metal clips attached to it for gripping papers. It was $15. After balking at that ridiculous price, I realized if I were to go that route, I’d have to buy at least four of those plaques to display the amount of artwork we usually had up at any given time—that would be $60. Not doable for our budget. And I didn’t even particularly like the design of these plaques; they had multi-colored lettering in a “cutesy” kids’ handwriting font. It just wasn’t my thing. But it got my gears turning, and I wondered, could I make my own clip system somehow, and at a much lower cost? Yes. Yes, I could!
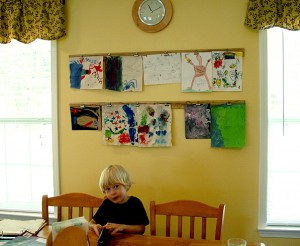
I measured our dining area’s wall between the two main windows, which is where I’d always envisioned hanging the boys’ artwork. Then I went to Lowe’s and had strips of wooden trim cut to size (cost was less than $10 for four strips). I stained them the same color as our kitchen cabinets (puritan pine). Then we used finish nails to nail them up on the wall between the windows (we nailed into studs), and I filled the nail holes. Lastly, I bought some metal bulldog clips. You can buy these at office supply stores, but they’re kind of pricey there for the amount I needed, so I ordered a box of 30 clips from Amazon.com for around $10. I screwed the clips directly into the wooden strips, at intervals spaced far enough to hold the usual size of their schoolwork papers. The result? Awesome, in my opinion!
A closer look:
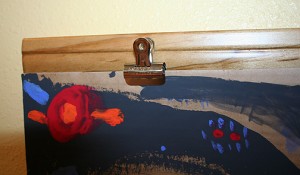
Closer still, view of the bulldog clip I used:
Since it’s our summer break, there’s no schoolwork on display, just artwork. Normally we have a lot of special school papers on display, and the clips are set up to do that when we’re back to school. The boys have been doing lots of painting during these past few weeks, and now those paintings can be tastfully displayed with my new system. The best part is how easy it is to switch out pictures and papers- just clip or unclip! They’ll be in use for years.
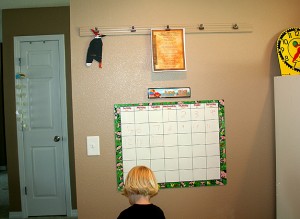
I had a couple of extra strips of wood, so I used one to go on our other dining area wall, the one I use to display our calendar and any semi-permanent posters. I used to have to tape those things directly on the wall, which not only looked tacky, but would take paint off every time I removed something. Now I have a dedicated display strip! I chose to paint this strip the same color as the wall, to make it blend in. I think it turned out great.
Right now, our only displayed item is the Ten Commandments and G’s model of a red pileated woodpecker. During our school year, I have unit posters and other things I like to display, and I can’t wait to use my new clip strip. I also found a way to better hang that calendar: I bought velcro strips! I put a small strip of velcro on each corner and in the middle, and stuck the backing to the wall in each corresponding spot. Now the calendar doesn’t fall down constantly anymore when tape wears out! I did the same for our month plaque; it’s also attached via velcro strip.
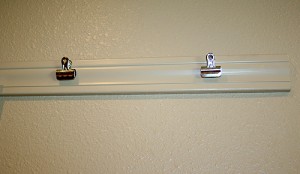
One more close-up of a bulldog clip and how it’s attached:
This was one of the projects I wanted to finish up during our summer break. It was really easy, just somewhat time-consuming on the day I stained/painted the strips and had to wait for them to dry between coats. And the total cost was less than $20! I’m so pleased with how they turned out. I still have an extra strip left over and plan to put that up in G’s room, for hanging all the posters and things he likes to have on his walls.
I recommend considering this system if you have lots of things to display, and want to do so in a way that integrates into your decor, yet makes switch-out quick and easy.


